Essential Temperature Guidelines for Cooking Ribs Safely
Why Monitoring Internal Temperatures is Crucial for Safety

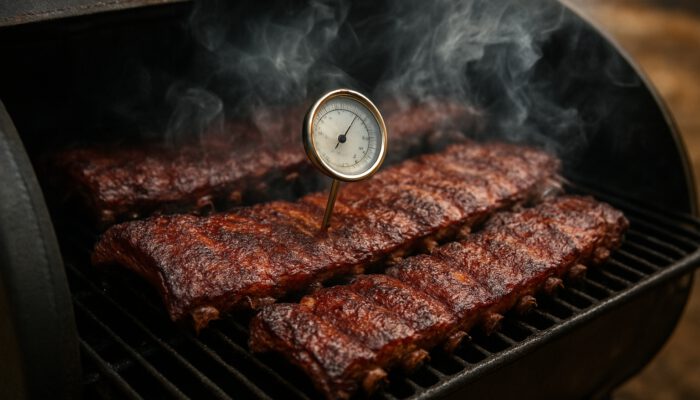
Ensuring the core temperature of ribs is monitored accurately is vital for both safety and quality in American kitchens. A dependable meat thermometer delivers precise internal temperature readings, allowing for consistent results across different cuts and cooking styles. This practice becomes especially important when preparing ribs for gatherings or family meals, where food safety is a top priority.
The USDA advises cooking pork ribs to a minimum internal temperature of 145°F to guarantee safety. numerous pitmasters strive for higher temperatures to achieve that fall-off-the-bone tenderness that many crave. Knowing how to accurately monitor these temperatures can empower home cooks to replicate the impressive results seen in restaurants and barbecue competitions.
Employing instant-read thermometers or probe thermometers simplifies the cooking process. These devices provide accurate readings and allow cooks to keep track of temperatures without frequently opening the grill or smoker, which can lead to heat loss. With practice, checking core temperatures becomes second nature, ensuring delicious ribs every time.
Choosing the Right Thermometer for Accurate Cooking
Selecting the appropriate type of thermometer is essential for assessing doneness in ribs. Different thermometers are designed for specific purposes, and understanding their functionalities can help prevent undercooked or overcooked meat. For instance, instant-read thermometers excel at quick checks, while probe thermometers can remain in the meat throughout the cooking process, offering continuous temperature updates.
When shopping for a thermometer, consider features such as accuracy, temperature range, and user-friendliness. Many cooks favor digital thermometers due to their rapid response times and precise readings. Some advanced models even come with Bluetooth connectivity, enabling remote monitoring of cooking temperatures, which is particularly advantageous during lengthy smoking sessions.
Investing in a reliable thermometer not only enhances food safety but also contributes to achieving the tender textures that barbecue enthusiasts appreciate nationwide. By ensuring their ribs are cooked to perfection, cooks can elevate their barbecue skills and impress friends and family at any gathering.
What Internal Temperature Indicates Fully Cooked Ribs?
To establish full doneness in ribs, the optimal internal temperature typically falls between 190°F and 205°F. Within this range, collagen and connective tissues break down, resulting in tender, juicy meat that separates easily from the bone. This temperature range is particularly significant for those who enjoy traditional barbecue styles, where ribs must be succulent and packed with flavor.
Achieving this temperature may require patience, especially for those utilizing low-and-slow cooking methods. It's crucial to monitor the temperature diligently, as cooking too rapidly can result in dryness. Many backyard cooks rely on a combination of time, temperature, visual cues, and texture to achieve their desired results.
To temperature, factors such as cooking method and the specific cut of meat can also affect doneness. For example, spare ribs may necessitate slightly different cooking times compared to baby back ribs. Understanding these distinctions enables cooks to create juicy ribs without compromising safety or flavor.
Identifying Temperature Hazards During Cooking
Being aware of potential temperature hazards while cooking is crucial for ensuring perfectly prepared ribs. Undercooked ribs can pose health risks, while overcooked ribs may lead to a disappointing dining experience. Maintaining consistent heat control is vital for meeting safety standards and achieving optimal flavor profiles.
One common hazard is the “danger zone,” defined as temperatures between 40°F and 140°F, where bacteria can thrive. Minimizing the time ribs spend in this temperature range is essential. Cooks should keep a close eye on cooking temperatures and ensure that the grill or smoker maintains appropriate heat levels throughout the cooking process.
Flare-ups present another risk, occurring when fat drips onto hot coals or flames. This can cause uneven cooking and potentially char the meat. By managing heat sources and utilizing indirect cooking methods, cooks can mitigate these dangers and ensure their ribs are both safe and delicious.
The Importance of Allowing Ribs to Rest After Cooking
Allowing ribs to rest after cooking is a crucial step that enhances both safety and flavor. Resting provides time for the internal temperature to stabilize and the juices to redistribute evenly throughout the meat. This process results in more flavorful ribs that meet expectations across the country.
Typically, ribs should rest for about 10 to 15 minutes after being taken off the heat. During this time, the meat continues to cook slightly, which can help achieve that perfect tender texture. Cooks should loosely cover the ribs with foil to retain warmth while preventing moisture loss.
Neglecting to rest ribs can lead to a dry texture and compromised flavor. Cutting into the meat too soon can cause the juices to escape, leaving the ribs less satisfying. By prioritizing resting periods, cooks can elevate their rib dishes and create unforgettable meals for family and friends.
Expert Techniques for Determining When Ribs Are Fully Cooked
Real-World Cooking Examples from American Kitchens
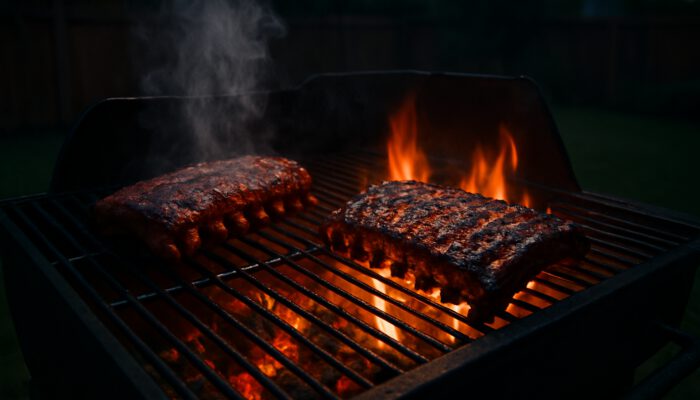
Insights from real American kitchens can greatly enhance understanding of heat zones and probe placements when cooking ribs. Many cooks adopt a two-zone cooking method, where one side of the grill is heated directly while the other remains cooler. This technique allows for better temperature control, which is essential for perfecting rib recipes.
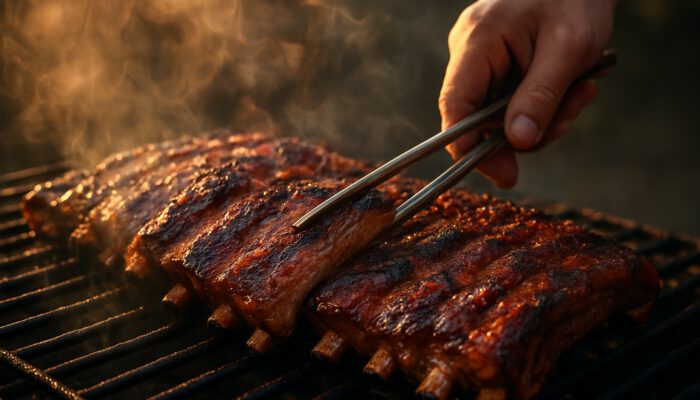
For example, a common practice in backyard barbecues involves starting ribs over indirect heat to facilitate slow cooking, then finishing them over direct heat to develop a caramelized crust. This method is frequently utilized in regions like Texas and Kansas City, where barbecue traditions emphasize both tenderness and rich flavor.
Correct probe placement is critical in determining doneness. Inserting the thermometer into the thickest part of the meat, away from the bone, ensures accurate readings. Many seasoned cooks suggest testing multiple spots to confirm doneness across the entire rack, preventing uneven results due to variations in meat thickness.
Expert Insights on Ensuring Thermometer Accuracy
Expert insights on thermometer accuracy can significantly refine cooking techniques and minimize common errors during extended low-and-slow sessions. Proper calibration of thermometers is essential for consistent results. Many cooks recommend checking their thermometer's accuracy against boiling water or ice water to ensure reliable readings.
Understanding the differences between probe thermometers and instant-read thermometers is also vital. While instant-read thermometers provide quick results, they may not reflect the true internal temperature if inserted improperly. Conversely, probe thermometers allow for continuous monitoring, making them ideal for lengthy cooking sessions commonly found in home kitchens.
Cooks should also recognize how temperature fluctuations can impact cooking times. For instance, frequently opening the grill or smoker can lead to heat loss and longer cooking durations. By maintaining a steady temperature and using accurate probes, cooks can minimize errors and consistently achieve tender, flavorful ribs.
Thoroughly Testing Multiple Sections of Ribs
Thoroughly testing multiple sections of ribs is vital for avoiding uneven results and meeting professional standards for tenderness. Ribs can differ significantly in thickness and composition, meaning some sections may cook faster than others. By checking various areas, cooks can ensure that all parts of the rack are cooked to the desired doneness level.
When testing, focus on the thickest part of the meat, as this area typically requires the longest cooking time. using a thermometer to measure temperatures in different spots helps identify any discrepancies that might indicate uneven cooking. This practice is especially crucial when preparing large quantities for gatherings or competitions.
Cooks can also rely on visual cues, such as color and texture, to assess doneness. Well-cooked ribs should exhibit a desirable bark on the outside, while the meat appears moist and tender. By combining temperature checks with visual evaluations, cooks can achieve professional-quality results that meet expectations in both competitive and casual settings.
How to Use the Toothpick Test to Assess Rib Readiness
Utilizing Tools at Key Intervals for Assessment
The toothpick test is a straightforward yet effective method for gauging the readiness of ribs without requiring advanced tools. By inserting a toothpick or similar implement at strategic intervals, cooks can evaluate the breakdown of connective tissues. This technique is particularly beneficial during casual or weekend cooking when precision is vital, but tools may be limited.
To execute the toothpick test, insert the toothpick between the bones of the ribs. If it slides in easily with minimal resistance, the ribs are likely done. On the other hand, if the toothpick encounters significant resistance, the ribs require additional cooking time. This method offers a quick and accessible means to assess doneness, especially for novice cooks.
Cooks can improve their skills by practicing this technique regularly. As they become more familiar with the sensation of properly cooked ribs, they can refine their timing and methods, resulting in consistently excellent outcomes. The toothpick test serves as a valuable tool for both novice and experienced cooks alike.
Correctly Interpreting Levels of Resistance
Correctly interpreting resistance levels is essential for achieving the optimal pull-apart texture that characterizes well-prepared ribs. As ribs cook, collagen and connective tissues break down, leading to a tender bite. Knowing how to gauge this process can significantly enhance a cook's barbecue skills.
When conducting the toothpick test, minimal resistance indicates that the ribs have reached an ideal state. If the toothpick slides in effortlessly, it suggests that the meat has become tender and is ready to serve. noticeable resistance means the ribs require more cooking time to achieve that desired texture.
Cooks should also observe the overall appearance of the ribs. A well-cooked rack should display slight pullback from the bones and a glossy finish. By combining visual assessments with resistance checks, cooks can ensure their ribs are cooked to perfection, creating a satisfying experience for everyone at the table.
Is It Necessary to Test Multiple Spots on the Rack?
Testing multiple spots on the rack of ribs is a practical approach to confirming uniform cooking throughout larger portions. Ribs can vary in thickness, and different sections may cook at different rates. By checking multiple areas, cooks can prevent surprises when slicing for serving, ensuring that every bite is tender and flavorful.
When testing, concentrate on the thickest parts of the ribs, as these sections usually require the most cooking time. Inserting a toothpick or thermometer in various locations allows cooks to gauge overall doneness accurately. This method not only aids in achieving consistent results but also builds confidence in a cook's ability to prepare ribs flawlessly.
Testing multiple spots helps identify any areas needing more cooking. If some sections are tender while others remain firm, cooks can easily adjust their cooking times accordingly. This attention to detail is crucial for delivering a high-quality dining experience, whether for family meals or backyard barbecues.
Assessing Toothpick Cleanliness After Insertion
Evaluating toothpick cleanliness after insertion serves as a clear indicator of doneness in ribs. When the toothpick slides in easily and comes out clean, it suggests that the meat's internal structure has sufficiently broken down. This is a reliable sign that the ribs are ready to be served and enjoyed.
If the toothpick emerges with residue or meat stuck to it, this indicates that the ribs may require more cooking time. The presence of residue suggests that the connective tissues have not fully broken down, which can lead to a chewy texture. By employing this simple test, cooks can make informed decisions regarding the readiness of their ribs.
Cooks should also keep in mind the type of meat being prepared. Different cuts may necessitate adjustments in the application of the toothpick test. For instance, baby back ribs might yield different results compared to spare ribs. By understanding these variations, cooks can refine their techniques and ensure optimal cooking results for various recipes.
Understanding Variations in Meat Types When Testing
Recognizing the significance of meat type variations is essential for achieving the best outcomes when assessing rib doneness. Different rib cuts, such as baby backs and spare ribs, possess distinct characteristics that affect their cooking times and textures. Acknowledging these differences allows cooks to adjust their testing methods appropriately.
For example, baby back ribs are generally leaner and may cook faster than spare ribs, which tend to be fattier and have more connective tissue. This means that the toothpick test may produce varying levels of resistance based on the cut. Understanding these nuances enables cooks to tailor their approach and achieve optimal results for each type of rib.
Factors such as the meat's age and marbling can influence cooking times. Cooks should recognize that younger, grass-fed animals may yield different results compared to older, grain-fed ones. By considering these variations, cooks can enhance their skills and ensure that their ribs are cooked to perfection, regardless of the cut.
Proven Strategies for Determining When Ribs Are Done
Implementing Actionable Steps for Timing Checks
Implementing actionable steps for timing checks during the final cooking stages can help achieve balanced moisture retention and flavor development in every batch of ribs. Because cooking times can fluctuate based on grill type and meat thickness, having a plan in place is essential for success.
One effective strategy is to establish a timeline based on the cooking method used. For instance, when utilizing a smoker, cooks can anticipate a cooking duration of approximately 5 to 6 hours at 225°F to 250°F. During the last hour, it’s critical to begin checking for doneness using both temperature and visual cues to prevent overcooking.
Cooks can also set a timer to remind them to monitor the ribs periodically. This practice helps maintain focus and prevents the common mistake of losing track of time. By following these steps, cooks can maximize flavor retention and ensure their ribs are perfectly cooked, ready to impress family and friends.
Visually Evaluating Smoke Ring Formation
Visually assessing smoke ring formation provides valuable insights into proper exposure and heat management throughout the cooking process. A well-defined smoke ring is a hallmark of expertly smoked ribs, indicating that the meat has absorbed the right amount of smoke during cooking.
To achieve a desirable smoke ring, cooks should ensure that the ribs are exposed to smoke during the initial stages of cooking. This is when the meat is still at a lower temperature, allowing the chemical reactions necessary for smoke ring formation to occur. Observing the thickness and color of the ring can provide insight into the cooking process and overall quality.
A pronounced smoke ring often correlates with a richer flavor profile. Cooks should strive for a balance between smoke exposure and cooking time, as excessive smoke can overpower the meat's natural flavors. By monitoring smoke ring formation, cooks can refine their techniques and enhance the overall quality of their ribs.
Adjusting Cooking Techniques Based on Rack Thickness
Adjusting cooking techniques according to rack thickness is essential for achieving reliable outcomes when preparing both baby backs and spare ribs. Thicker racks may demand longer cooking times to ensure that the meat is tender and completely cooked, while thinner racks may cook more quickly.
When cooking ribs, it’s vital to consider the size and thickness of the rack being prepared. For example, baby back ribs, which are typically smaller and leaner, may require less cooking time than spare ribs, which are larger and fattier. Cooks should modify their timing and temperature accordingly to avoid overcooking or undercooking.
Alongside adjusting cooking times, cooks can also modify their approach based on thickness. For thicker racks, employing a two-zone cooking method can help achieve even cooking, allowing indirect heat to render fat while finishing over direct heat for a crispy exterior. By being mindful of rack thickness, cooks can ensure tender, flavorful ribs every time.
What Influences Rib Cooking Times?
The Impact of Starting Meat Temperature on Cooking Duration
The starting temperature of the meat plays a significant role in cooking duration when bringing ribs from refrigeration to the grill. Cold meat requires more time to reach the desired internal temperature, potentially leading to longer cooking times and inconsistencies in doneness.
To mitigate this effect, cooks should consider allowing ribs to reach room temperature before cooking. This practice can help shorten cooking time and promote even heat penetration throughout the meat. A good guideline is to let the ribs sit at room temperature for approximately 30 minutes before placing them on the grill or smoker.
Understanding how various cooking methods impact starting temperatures is crucial. For example, when using a smoker, the initial temperature of the meat can influence how quickly it reaches the ideal cooking temperature. By considering starting meat temperature, cooks can better manage their cooking times and achieve consistently delicious results.
How Humidity Affects Cooking Time
Humidity can significantly influence the cooking process when preparing ribs outdoors, as weather variations can alter evaporation rates and overall timing requirements. High humidity levels can slow down cooking, while low humidity can lead to quicker evaporation, potentially resulting in dry meat.
When cooking in humid conditions, cooks may notice that their ribs take longer to achieve the desired internal temperature. This is due to moisture in the air affecting heat transfer, resulting in slower cooking. To adapt to these conditions, cooks should closely monitor their ribs and adjust cooking times accordingly.
Conversely, in low-humidity environments, cooks must be cautious about moisture retention. Techniques such as spritzing the ribs with liquid or wrapping them in foil can help maintain moisture levels during cooking. By understanding how humidity impacts the process, cooks can make informed adjustments to ensure their ribs remain tender and flavorful.
Addressing Variations in Bone Size
Variations in bone size among different rib cuts necessitate careful attention to prevent overcooking thinner areas while ensuring thicker portions reach ideal tenderness. Different rib cuts have varying bone structures, which can affect cooking times and overall doneness. Understanding these differences is essential for achieving consistent results.
For example, spare ribs generally feature larger bones compared to baby back ribs, influencing how heat penetrates the meat. Cooks should be mindful of these variations and adjust their cooking techniques accordingly. This may involve checking different sections of the rack for doneness, as some areas may cook more quickly than others.
Cooks can employ indirect cooking techniques to promote even heat distribution. By positioning thicker sections away from direct heat sources, cooks can ensure that all parts of the rack cook evenly, resulting in tender, juicy ribs. Paying attention to bone size variations is crucial for delivering high-quality barbecue that pleases every guest.
Executing the Bend Test Effectively
Safely Grasping Ribs with Tongs
Safely grasping the ends of the ribs with tongs enables cooks to observe flexibility, indicating collagen breakdown without prematurely cutting into the meat. The bend test serves as a simple yet effective method for assessing doneness and tenderness in ribs.
To conduct the bend test, hold the ribs at both ends and gently lift them. If the ribs bend easily and the meat starts to crack slightly between the bones, this suggests they are likely done. A good bend indicates that the collagen has sufficiently broken down, resulting in a tender texture typical of well-cooked ribs.
Cooks should take care not to overhandle the ribs, as excessive manipulation can lead to moisture loss. By utilizing tongs to perform the bend test, cooks can assess doneness without compromising the meat's quality. This technique is a valuable tool for both novice and seasoned cooks alike.
Identifying the Ideal Crack Appearance
Identifying the ideal crack appearance between bones is crucial for confirming doneness in ribs destined for popular American barbecue dishes. When ribs are perfectly cooked, the meat should exhibit a slight pullback from the bones, revealing a beautiful crack that signifies tenderness.
During the bend test, cooks should look for this crack as an indicator of well-cooked ribs. If the meat appears to be pulling away from the bones, it suggests that the collagen has broken down adequately, resulting in a tender bite. This visual cue is an essential aspect of achieving that coveted barbecue experience.
To observing the crack appearance, cooks should pay attention to the overall texture and color of the ribs. A well-cooked rack should have a desirable bark on the outside, along with a glossy finish that indicates moisture retention. By recognizing these visual cues, cooks can confidently serve ribs that are both delicious and visually appealing.
Improving Consistency Through Practice
Consistency in rib cooking improves over time as cooks refine their hand movements and visual assessments through repeated cooking experiences. The bend test, along with other techniques, becomes more intuitive as cooks gain familiarity with different cuts of ribs and cooking methods.
As cooks experiment with various techniques and recipes, they develop a deeper understanding of how ribs respond to different cooking conditions. This knowledge empowers them to make informed decisions about timing, temperature, and testing methods, leading to consistently excellent results.
Keeping a cooking journal can assist in tracking progress and identifying successful strategies. By noting cooking times, temperatures, and outcomes, cooks can enhance their approach and build confidence in their skills. Over time, this practice leads to a deeper mastery of rib cooking, resulting in tender, flavorful dishes that impress family and friends.
Avoiding Common Mistakes When Checking Doneness
Why Relying Solely on Time Estimates Can Be Misleading
Relying exclusively on time estimates can result in disappointing outcomes when cooking ribs. Variables such as grill calibration, the meat's starting state, and environmental conditions can create unpredictable results that necessitate direct verification. Instead of strictly adhering to a timer, cooks should prioritize temperature and visual cues to determine doneness.
It's crucial to remember that every grill and piece of meat is unique. Factors like thickness, fat content, and cooking method can all influence cooking times. By focusing on temperature checks and visual assessments, cooks can ensure that their ribs are cooked to perfection, regardless of the time involved.
Relying solely on time can lead to overcooked or dry ribs. By adopting a flexible approach that considers multiple indicators of doneness, cooks can avoid common pitfalls and achieve consistently delicious results that satisfy their guests.
Key Pitfalls for Beginners to Avoid
For beginners, steering clear of common pitfalls can significantly enhance rib cooking outcomes. Here are some key mistakes to be aware of:
- Opening the grill or smoker too frequently, leading to heat loss.
- Ignoring carryover cooking effects, where meat continues to cook post-removal from heat.
- Not utilizing a reliable thermometer to check for doneness.
- Failing to allow ribs to rest, resulting in dry meat.
- Overcooking or undercooking based solely on time estimates.
- Neglecting to test multiple sections for even doneness.
- Applying too much sauce too early, which can burn and impact flavor.
- Overlooking variations in meat thickness and type.
By being mindful of these pitfalls, novice cooks can sharpen their skills and achieve better results with their rib preparations.
The Importance of Resting Periods
Neglecting resting periods can lead to significant issues with juice redistribution, affecting final texture and slicing quality. After cooking, ribs require time to rest, allowing the juices to settle and redistribute throughout the meat. This step is essential for achieving tender, flavorful ribs that are enjoyable to eat.
Failing to rest ribs may result in dry meat, as cutting into the ribs too soon causes the juices to escape. For optimal results, cooks should allow ribs to rest for about 10 to 15 minutes after removing them from the heat. Loosely covering the ribs with foil can help retain warmth while preventing moisture loss.
Resting periods allow the meat to continue cooking slightly, achieving that perfect texture. By prioritizing resting times, cooks can elevate their rib dishes and create memorable meals that impress their guests.
Frequently Asked Questions
What is the Optimal Internal Temperature for Ribs?
The ideal internal temperature for ribs typically ranges between 190°F and 205°F. This temperature range ensures that collagen breaks down, resulting in tender, juicy meat.
How Can I Determine if My Ribs Are Done Without a Thermometer?
You can utilize the toothpick test or the bend test. If a toothpick slides in smoothly or the ribs bend without breaking, they are likely done.
How Long Should I Grill Ribs?
Cooking times can vary, but ribs generally take about 5 to 6 hours at 225°F to 250°F. Monitoring both temperature and visual cues is essential for determining doneness.
What is a Smoke Ring, and Why Does It Matter?
A smoke ring is a pink layer of smoke flavor that forms on the exterior of smoked meat. It indicates proper smoke exposure and enhances the flavor profile of the ribs.
Do I Need to Wrap Ribs in Foil During Cooking?
Wrapping ribs in foil, often referred to as the “Texas Crutch,” can help retain moisture and speed up cooking. Whether to do so is a matter of personal preference based on desired texture.
Can I Cook Ribs in the Oven Instead of on a Grill?
Yes, ribs can be cooked in the oven. Slow-roasting at a low temperature can yield tender results, and finishing under the broiler can create a nice crust.
What Should I Serve With Ribs?
Ribs pair wonderfully with classic sides such as coleslaw, baked beans, cornbread, and potato salad. These sides complement the rich flavors of the meat.
How Do I Store Leftover Ribs?
Store leftover ribs in an airtight container in the refrigerator for up to 3–4 days. For longer storage, consider freezing them to extend their shelf life.
Which Types of Ribs Are Best for Smoking?
Baby back ribs and spare ribs are popular choices for smoking. Each offers unique flavors and textures, making them suitable for various cooking styles.
How Can I Enhance My Rib Cooking Skills?
Practice is crucial for improving rib cooking skills. Experiment with diverse techniques, keep notes on your results, and learn from each cooking experience.