
Mastering the Art of Preparing Chicken for Irresistibly Crispy Skin
Choosing the Perfect Chicken for Smoking

How to Achieve a Crispy Skin on Smoked Chicken: The quest for achieving crispy skin on smoked chicken begins with the careful selection of your chicken. Opt for a fresh, high-quality bird, preferably free-range or organic, as these options typically deliver superior flavor and texture, which are crucial for successful smoking. Upon bringing your chicken home, start by patting the skin dry with paper towels. This simple yet vital step removes excess moisture, which is essential for that much-desired crispy skin once it’s smoked.
Excess moisture on the skin can lead to steaming instead of crisping during the smoking process. Additionally, consider the chicken's weight; smaller birds, typically between 3 and 5 pounds, tend to cook more evenly. This weight range ensures that you achieve a perfect balance of juicy meat and crispy skin, making your dish more enjoyable to eat.
When selecting your chicken, inspect the skin for any blemishes or discoloration. A healthy chicken will have a clean, plump appearance, indicating freshness and vitality. Pay attention to the layer of fat beneath the skin as well; a good fat layer aids in rendering moisture, which is crucial for achieving that delightful crunch you’re aiming for.
Enhancing Flavor and Moisture with Brining
Brining is an essential technique that serves two important purposes: enhancing flavor and ensuring moisture retention during the smoking process. To create your brine, combine water, salt, and sugar, and then infuse it with herbs and spices to enhance the flavor profile. This solution allows the chicken to absorb moisture, resulting in a juicier final product that is bursting with flavor.
Soak your chicken in the brine for at least 4-6 hours or, for best results, overnight. This extended soaking period allows the salt to penetrate the meat thoroughly, guaranteeing that each bite is infused with rich flavors. During the brining process, it is vital to keep the chicken refrigerated to prevent any bacterial growth that could compromise the safety of your dish.
Once the brining period is complete, rinse the chicken under cold water to remove any excess salt, then pat it dry with paper towels. This step is critical; if the skin remains wet, it will not achieve that sought-after crispiness during smoking. By brining, you also have the opportunity to create a delicious flavor profile by adding various spices or herbs, giving your smoked chicken an unexpected depth of taste that sets it apart from the ordinary.
Let the Podcast Play?
Transforming Chicken with a Flavorful Dry Rub
The secret to a fantastic smoked chicken lies in the seasonings, and a well-crafted dry rub is a key component of this equation. A balanced dry rub can elevate the flavors of your chicken while helping to achieve that crispy skin. Start with a base of kosher salt and freshly ground black pepper, then mix in your choice of spices, such as paprika, garlic powder, and onion powder.
Applying the dry rub is an art form in itself. Generously coat the entire chicken, ensuring that every nook and cranny is well-covered. This not only imparts flavor but also helps draw moisture out of the skin, creating a barrier that encourages crispness during the cooking process.
After applying the dry rub, allow the chicken to sit for at least 30 minutes. This waiting period allows the flavors to blend and the salt to penetrate the meat fully. For those looking to experiment, consider adding brown sugar for a hint of sweetness or cayenne pepper for an extra kick. The versatility of dry rubs enables you to tailor your chicken to your taste preferences, making it a fantastic option for family gatherings and barbecues.
Ensuring Even Cooking through Trussing

Trussing may seem like an unnecessary step, but it is essential for ensuring your chicken cooks evenly and retains its shape. By securing the legs and wings with kitchen twine, you create a compact bird that cooks uniformly, facilitating crispy skin throughout.
To truss your chicken, start by placing it breast-side up. Tuck the wing tips under the body to prevent burning. Then, take a length of kitchen twine, loop it around the chicken's legs, and tie them together. This not only enhances visual appeal but also prevents the legs from splaying out during the smoking process.
Trussing promotes consistent cooking, decreasing the likelihood of overcooking some areas while undercooking others. It also aids in moisture retention, which is essential for achieving juicy meat beneath that perfectly crispy exterior. When the chicken is fully smoked, its shape will remain intact, providing an impressive presentation that is sure to wow your guests.
Optimizing Your Smoker Setup for Best Results
Selecting the Ideal Smoker for Perfect Chicken
The choice of smoker can significantly impact your success in achieving crispy skin on smoked chicken. For beginners, electric or pellet smokers serve as excellent options, offering consistent temperature control and ease of use. These types of smokers simplify the process, allowing you to concentrate on flavor rather than constantly monitoring the temperature.
Electric smokers are particularly user-friendly, featuring digital controls that allow you to set your desired temperature precisely. Pellet smokers use wood pellets to generate smoke and heat, delivering a rich flavor that pairs beautifully with chicken.
If you're feeling adventurous and wish to explore more traditional methods, charcoal smokers provide a classic experience with the potential for richer flavor complexity. However, they require more attention to maintain optimal temperature and smoke levels. Whatever your choice, ensure that your smoker has proper ventilation and sufficient space for air and smoke circulation, which are critical for achieving that delightful crispy skin.
Preparing Wood Chips for Optimal Flavor
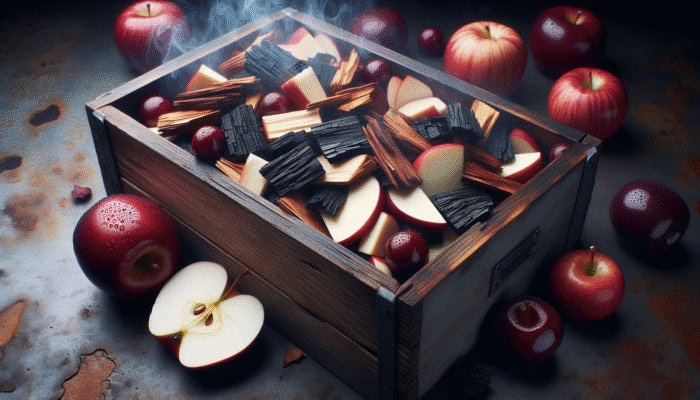
Choosing the right wood chips is essential for imparting the desired flavor while smoking your chicken. Fruit woods, such as apple or cherry, are particularly well-suited for poultry, providing a mild, slightly sweet smoke that enhances the chicken's flavor without overwhelming it.
Before using wood chips in your smoker, soak them in water for at least 30 minutes to ensure they are properly hydrated. Soaking prevents the chips from igniting too quickly, allowing them to smolder and produce a steady stream of flavorful smoke. Once ready, drain the chips and mix them in with the smoker's heating elements or place them in a smoke box, depending on your smoker type.
Feel free to experiment with different wood varieties to discover your preferred flavor. Hickory imparts a robust flavor that can be delightful when used in moderation. Mesquite, while more intense, can add a unique twist when used sparingly. Each type of wood brings its characteristics, allowing you to customize your smoked chicken experience to your liking.
Maintaining Optimal Temperature for Cooking Success
Controlling temperature is crucial for mastering the art of smoking chicken. Aim to maintain a steady temperature between 225°F and 250°F. This temperature range allows for slow cooking, ensuring that the meat remains juicy while providing the skin with the opportunity to crisp up perfectly.
To achieve this, use a reliable smoker thermometer to monitor internal conditions accurately. If your smoker features vents, adjust them to regulate airflow, as this directly affects the temperature. Opening the vents increases heat, while closing them can decrease it, so finding the right balance is essential.
Additionally, avoid placing your chicken directly over the heat source. Instead, position it in a cooler section of the smoker, allowing for indirect cooking. This method helps prevent the skin from burning while promoting even cooking throughout the entire bird.
Techniques for Achieving Perfectly Crispy Skin
Starting with High Heat for Optimal Crispiness
To kick off your smoking experience, begin with high heat for the first 30 minutes. This initial burst of heat is crucial for achieving crispy skin on smoked chicken. High temperatures help to quickly render the fat beneath the skin, promoting that sought-after crispiness.
During this initial phase, it is important to monitor the chicken closely to ensure that the skin begins to crisp up without burning. After the first half hour, you can lower the temperature to the ideal smoking range of 225°F to 250°F. This technique allows the chicken to cook thoroughly while maintaining the skin’s texture.
Having a high-quality meat thermometer on hand is also beneficial. This tool will enable you to check internal temperatures without repeatedly opening the smoker, which can lead to heat loss. Remember, the goal is to achieve a balance where the outer skin crisps beautifully while the inner meat remains juicy and tender.
Utilizing a Water Pan to Enhance Moisture
Incorporating a water pan into your smoking setup can greatly enhance the results. Placing a pan of water inside your smoker helps maintain humidity levels, which is essential for preventing the chicken skin from drying out too quickly. This added moisture creates a more controlled environment, ensuring that the skin crisps while the meat remains moist.
The steam generated from the water pan can contribute to the cooking process, allowing the chicken to cook evenly without losing its natural juices. This technique also helps create a beautiful, glossy finish on the skin, making your smoked chicken visually appealing.
To elevate the flavor even further, consider adding herbs, citrus slices, or even beer to the water pan. As the water evaporates, these elements will infuse your chicken with subtle flavors that complement the smokiness beautifully, adding layers of complexity to your dish.
Finishing Your Chicken with a Broil for Maximum Crispiness
For the ultimate finishing touch on your smoked chicken, broiling it for a few minutes after smoking can create an irresistible crispy skin. Once the chicken reaches the desired internal temperature of 165°F, transfer it to a preheated broiler. This method exposes the skin to direct heat, further enhancing the crispiness.
Keep a close watch on your chicken during this step, as broiling can quickly transition from perfectly crisp to charred. Just a few minutes under the broiler is all you need to achieve that golden-brown finish that makes your smoked chicken truly stand out.
This finishing technique not only improves the texture but also adds visual appeal, making the dish more enticing. The combination of smoky flavor and crispy skin will leave your guests eagerly anticipating their first bite.
Enhancing Flavor with a Dry Rub Before Broiling
Revisiting the importance of the dry rub, a second application just before broiling can intensify flavors and further enhance crispiness. Ensure that you lightly reapply your dry rub, focusing particularly on areas where the skin appears less seasoned.
This technique acts as a barrier that aids in further moisture removal during the broiling process. The added salt from the rub will continue to draw moisture from the skin, allowing for maximum crisping.
Feel free to experiment with flavors in your rub, adjusting spices according to your preferences. Consider adding a touch of brown sugar or experimenting with different aromatics to create a unique flavor profile that distinguishes your smoked chicken from the rest.
Scoring the Skin for Enhanced Crispiness
Scoring the skin of your chicken is a simple yet effective technique that can significantly enhance crispiness. Lightly cutting the skin in a crisscross pattern allows fat to escape, releasing moisture and making it easier for the skin to crisp up during the cooking process.
Be cautious not to cut too deep; the goal is to pierce the skin rather than the meat underneath. This technique works particularly well with chickens that have a substantial layer of fat, as it facilitates the rendering process.
In addition to improving texture, scoring the skin can also allow for better absorption of your dry rub. The cuts create channels for the seasoning to penetrate, resulting in a more flavorful and succulent bird. With this technique, you have another tool at your disposal to ensure your chicken comes out perfectly crispy and delicious every time.
Monitoring Cooking Time for Perfect Results
Utilizing a Meat Thermometer for Accurate Measurements
A reliable meat thermometer is indispensable for achieving perfect results in your pursuit of crispy skin on smoked chicken. Insert the thermometer into the thickest part of the chicken, avoiding contact with the bone, which can yield a false reading.
Aim for an internal temperature of 165°F, which is vital for ensuring your chicken is safe to eat while remaining juicy and tender. Monitoring the temperature throughout the smoking process helps prevent overcooking, which can lead to dry meat and compromised texture.
Incorporating a digital meat thermometer with an alarm feature can add convenience, allowing you to focus on other aspects of your cook. This way, you can ensure your chicken reaches the perfect doneness without the need to constantly check it manually.
Estimating Cooking Time Accurately
Estimating cooking time is an essential skill for any pitmaster. As a general guideline, plan for approximately 3-4 hours of smoking, depending on the size of the chicken and the temperature maintained in the smoker.
A chicken weighing between 4 and 5 pounds will typically fit this time frame. However, several factors can influence cooking time, including the specific type of smoker, outdoor temperature, and even humidity levels.
Regularly checking the internal temperature is the best way to ensure doneness. Keep in mind that larger birds may require additional time, while smaller birds may cook more quickly. Adjust your plans accordingly and always prioritize internal temperature over cooking time.
Allowing the Chicken to Rest for Maximum Juiciness
After your chicken has finished smoking, allowing it to rest is a critical step that should not be overlooked. Resting for 10-15 minutes enables the juices to redistribute throughout the meat, ensuring a flavorful and moist final product.
During this time, the skin will also have a moment to firm up, which can enhance its crispiness. Cover the chicken loosely with aluminum foil to keep it warm while resting; however, avoid wrapping it tightly, as this can trap steam and cause the skin to become soft.
This step not only helps improve texture but also enhances the overall eating experience, as every bite will be succulent and flavorful. Patience is key; a few minutes of waiting will reward you with a chicken that is both delicious and beautifully presented.
Checking for Doneness with Visual Cues
The visual appeal of your smoked chicken is just as important as its flavor and texture. A perfectly cooked chicken should have a golden-brown color, a clear skin surface, and juices that run clear when pierced.
In addition to relying on your meat thermometer, also use visual cues. To ensure the meat is cooked to the desired temperature, the skin should appear crispy and taut, while the meat should feel firm yet tender to the touch. If still uncertain, consider cutting into the thickest part of the thigh to check for doneness and the absence of pink meat.
Serving a perfectly cooked chicken not only ensures a safe meal but also provides an aesthetically pleasing dish that will impress your friends and family, showcasing your skills as a master of the barbecue.
Flavor Enhancements for Your Smoked Chicken
Incorporating Fresh Herbs and Spices for Depth of Flavor
Elevating the flavor of your smoked chicken is easily achievable by incorporating fresh herbs and spices into your dry rub or brine. Popular choices like rosemary, thyme, and sage add aromatic qualities that can enhance the overall taste experience.
Consider mixing these herbs into your dry rub for an additional burst of flavor. The essential oils in fresh herbs will infuse the chicken as it smokes, creating a delightful complexity that pairs wonderfully with the natural smoky flavor of the meat.
You can also place fresh herbs inside the cavity of the chicken before smoking. This technique allows the herbs to release their aromatic oils as the chicken cooks, further enriching the flavor profile. Experimenting with different combinations can help you discover unique tastes that will keep your friends and family coming back for more.
Using Marinades to Enhance Flavor and Tenderness
Marinating your chicken overnight can significantly enhance its flavor and tenderize the meat. A marinade consisting of oil, vinegar, and your choice of spices can penetrate the chicken, creating a succulent taste that harmonizes beautifully with the smoking process.
Consider using citrus juices, such as lemon or lime, for added acidity, which brightens the flavor while helping to break down the meat fibers. Combine these with herbs, spices, and a touch of sweetness from honey or brown sugar for a well-rounded marinade.
After marinating, be sure to pat the chicken dry thoroughly before applying any dry rub. This step ensures the skin can crisp during the smoking process while still allowing all the delicious flavors from the marinade to remain within the meat.
Experimenting with Different Wood Types for Unique Flavors
The choice of wood used in smoking can dramatically shift the flavor profile of your chicken. While apple and cherry woods are popular for their mild flavors, don’t hesitate to explore stronger options like hickory or mesquite.
Hickory provides a robust, smoky flavor that can stand up to richer marinades or rubs. Mesquite, while potent, can add a unique twist when used sparingly, making it an excellent choice for those looking to experiment with flavor. The key is to find a balance that complements the chicken without overwhelming it.
Consider blending different types of wood for a more complex flavor. For instance, mixing fruit wood with hickory can give you the best of both worlds: a sweet, fruity aroma combined with a hearty, smoky depth that elevates your chicken to an entirely new level.
Avoiding Common Mistakes in Smoking Chicken
Avoiding Overcrowding Your Smoker
One of the most frequent pitfalls when smoking chicken is overcrowding the smoker. Ensuring sufficient space between each bird is essential for optimal air and smoke circulation, which promotes even cooking. When chickens are packed too closely together, they can create steam pockets that hinder the crisping process, leading to a disappointing texture.
To achieve the best results, consider smoking one chicken at a time. If you're cooking multiple chickens, ensure there’s ample room for air to flow. This setup not only aids in achieving crispy skin but also allows the smoke to reach every part of the bird evenly, enhancing the overall flavor.
If your smoker has multiple racks, position the chickens so that they are not directly stacked on top of each other, allowing smoke to circulate freely. With careful planning, you can create a harmonious cooking environment that yields delicious, perfectly smoked chicken every time.
Minimizing the Frequency of Opening the Smoker
When it comes to smoking chicken, patience is paramount. Opening the smoker too frequently can lead to temperature fluctuations that negatively impact the cooking process. Each time the lid is lifted, valuable heat escapes, extending the cooking time and potentially compromising the chicken's texture.
Limit the number of times you open the smoker to check on your chicken. Instead, rely on your thermometer and your sense of smell to gauge progress. If you're concerned about cooking times, take note of your previous cooking experiences to refine your process over time.
Consider setting up a timer or alarm that alerts you when it's time to check the internal temperature, rather than doing so recklessly. This small change can make a significant difference in your smoking efforts, contributing to the overall quality of your final product.
Ensuring Proper Drying of the Chicken Skin
Moisture on the chicken's skin is the enemy of crispiness. To ensure success in achieving a crispy skin on smoked chicken, it’s critical to dry the skin thoroughly before applying the rub and smoking. After rinsing the chicken after brining, use paper towels to absorb any remaining moisture.
If the skin remains wet, it will steam during cooking rather than crisp up, leading to disappointing results. A thorough drying process can make all the difference, ensuring your chicken emerges from the smoker with beautifully rendered, crispy skin.
To further enhance this process, consider placing the chicken uncovered in the refrigerator for a couple of hours before cooking. This method allows the skin to dry out even further, promoting a crisper texture during smoking.
Monitoring Wood Usage for Balanced Flavor
While adding wood chips is essential for flavor, using excessive amounts can have the opposite effect. Overloading your smoker with wood can result in an overwhelmingly smoky flavor that overpowers the chicken's natural taste.
Start by using a modest amount of wood chips, then assess the smoke intensity during cooking. You can always add more as needed, but removing wood chips mid-cook is challenging. A balanced approach ensures that the chicken remains the star of the dish, enhanced by smoke without being dominated by it.
Monitoring the color of the smoke is a good indicator of intensity. Ideally, you want a thin, blue smoke rather than thick, white smoke, which can indicate too much wood. Achieving the right balance will enhance your chicken’s flavor and elevate your reputation as a skilled smoker.
Prioritizing Temperature Control for Best Results
Temperature control is the cornerstone of successful smoking. Ignoring temperature variations can lead to uneven cooking and compromised texture. Make it a priority to invest in a high-quality thermometer, and familiarize yourself with the vent systems on your smoker to regulate airflow effectively.
Maintain a stable temperature throughout the cook, making minor adjustments as needed to keep it within the optimal smoking range. This diligence will ensure that the chicken cooks evenly, resulting in tender meat and crispy skin that is the hallmark of excellent barbecue.
With practice, your ability to control temperature will improve, leading to consistently excellent results. Embrace the learning curve, and remember that each cook contributes to your expertise, enhancing your future smoking endeavors.
Frequently Asked Questions About Smoking Chicken
What type of chicken is best for smoking?
Look for fresh, high-quality chickens that are ideally free-range or organic. Weighing between 3 and 5 pounds is ideal for even cooking and achieving crispy skin.
How long should I smoke a chicken?
Plan for approximately 3-4 hours of smoking, depending on the weight of the chicken and the temperature of your smoker. Always monitor the internal temperature to ensure the food is cooked through.
Can I use frozen chicken for smoking?
While it’s best to use fresh chicken, you can smoke thawed chicken. Ensure it is completely thawed and thoroughly patted dry before starting the smoking process.
Do I need to brine the chicken?
Brining is recommended as it enhances flavor and moisture retention. Soaking in a brine solution helps achieve a juicier chicken and crispier skin.
How do I know when the chicken is done?
Use a meat thermometer to ensure that the internal temperature reaches 165°F. The juices should run clear when pierced, and the skin should be a beautiful golden brown.
Is it necessary to truss the chicken?
While not mandatory, trussing helps the chicken cook evenly and maintain its shape, contributing to a more appealing presentation and improved texture.
What wood chips should I use for smoking chicken?
Fruit woods like apple and cherry are excellent choices for chicken. They provide mild, sweet flavors that complement the meat without overwhelming it.
Can I smoke chicken without a smoker?
Yes! You can use a grill for indirect smoking with wood chips in a foil packet or an oven with a smoking box. However, the flavor may differ from traditional smoking methods.
How can I keep my skin crispy after smoking?
Ensure the skin is dry before smoking, and consider broiling for a few minutes post-smoking to enhance crispiness. Resting the chicken after cooking also helps maintain texture.
What can I do if my chicken skin isn't crispy?
If the skin isn't crispy, review your drying, brining, and smoking techniques to ensure optimal results. Ensure you're not overcrowding the smoker and maintain the correct temperature throughout the cooking process.